The Library · At the worktable
A Pocket on Every Turn
Make a folded-pocket stitched journal
Featuring Deep in the Forest
This little book begins with pockets already tucked into its pages. You won't have to decide where to keep the note, the photograph, or the tiny scrap you couldn't throw away. There's a place waiting.
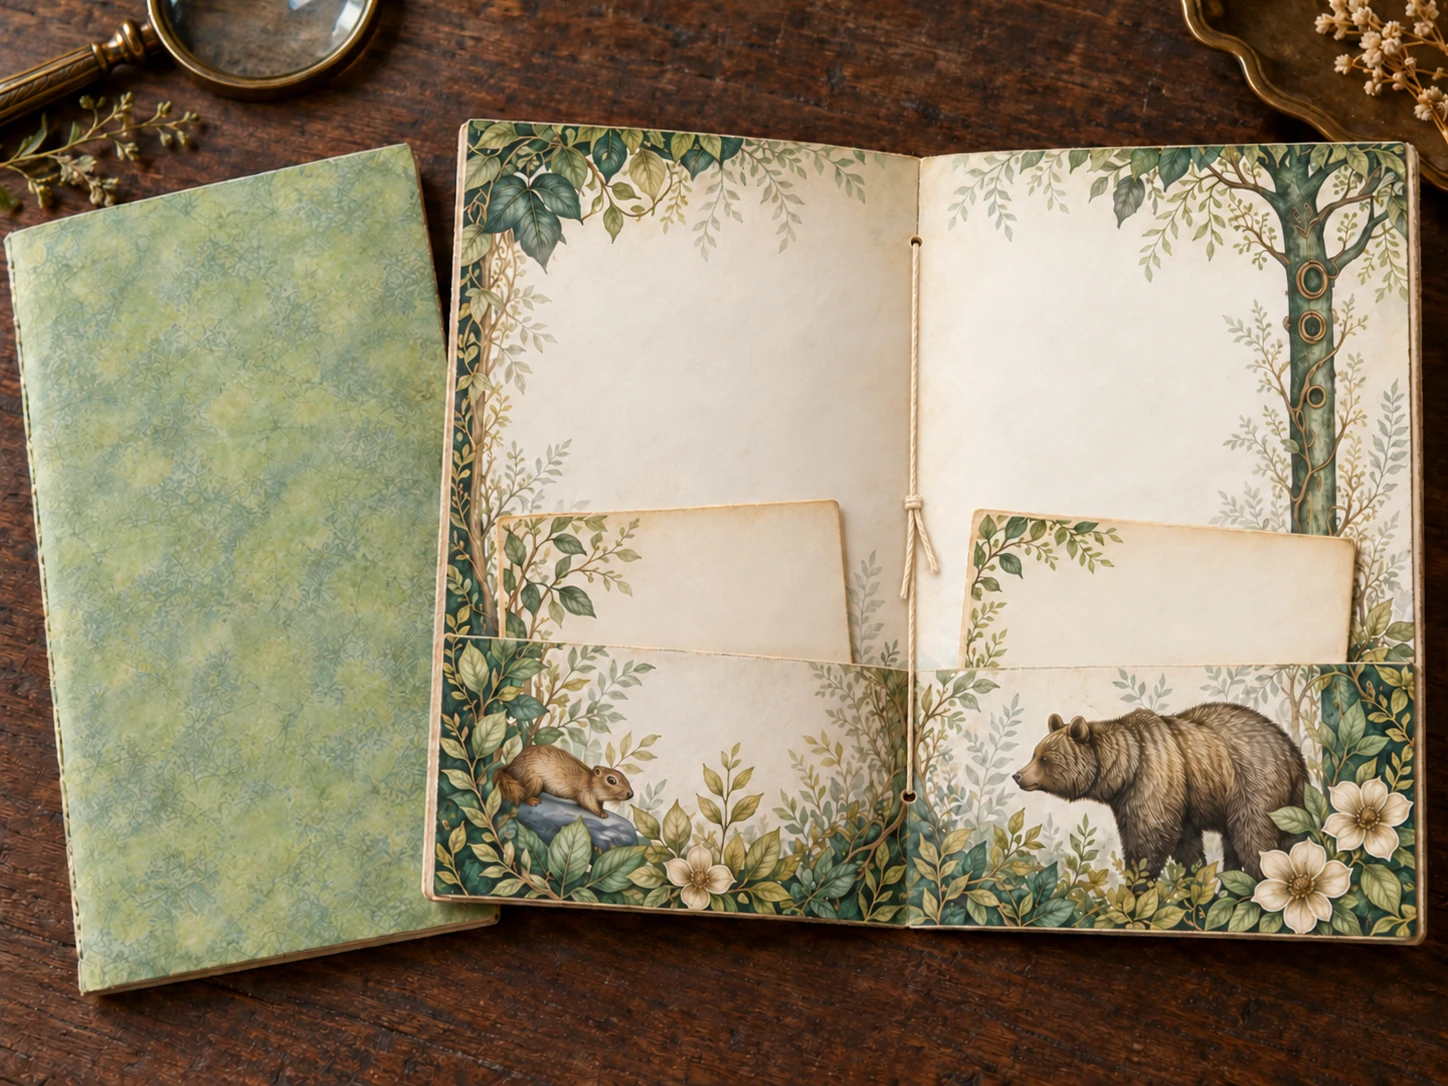
Finished size: 5½ wide × 8 tall.
Inside: three folded sheets, creating 12 pages; pockets appear on six page faces.
Allow: about one hour.
Gather and Cut
- Three sheets of sturdy paper, each 11 wide × 10 tall.
- One cardstock cover, 11 × 8.
- About 30 inches of binding thread.
- Needle, awl, ruler, scoring tool, clips, glue, and scrap cardboard.
- Optional cards, each 4¾ × 3.
The 10-inch-tall pocket sheets require larger paper than standard US Letter.
Let's Make It
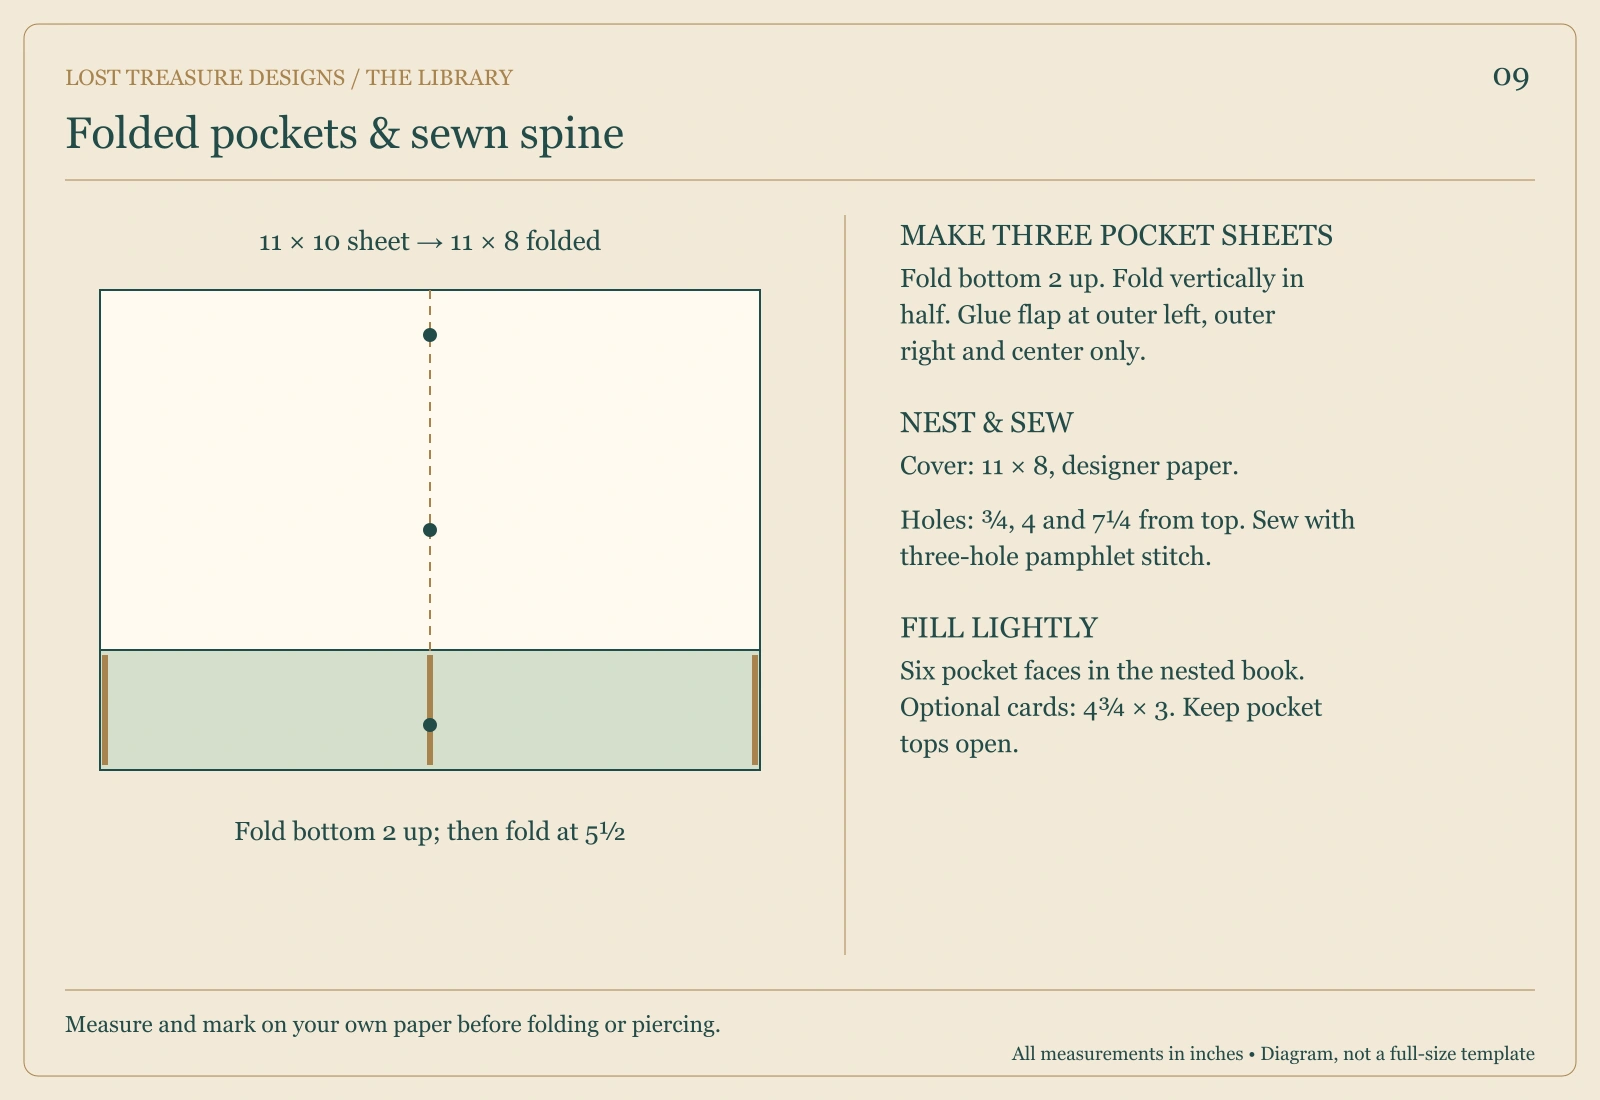
- Lay a pocket sheet with the side you want facing inside the pockets upward. Fold the bottom 2 inches up across the full width. The folded sheet is now 11 × 8.
- With that pocket flap still raised, fold the whole sheet vertically in half at 5½ inches. Open it again to see the two page faces above the pocket.
- Glue the pocket flap at its far left and far right edges using narrow glue lines. Add a narrow vertical glue line at the center fold to divide it into two separate pockets. Keep both pocket tops open.
- Repeat for the other two sheets. Let the glue dry before nesting them.
- Fold the 11 × 8 cover in half. Nest the three pocket sheets into one group and place them in the cover.
- Mark spine holes ¾ inch, 4 inches, and 7¼ inches from the top. Pierce the folded stack over scrap cardboard or a punching cradle.
- Sew out through the middle hole from inside, leaving a 4-inch tail. Enter the top hole, travel down inside and exit the bottom hole, then return inside through the middle.
- Place the two thread ends on opposite sides of the long interior stitch. Snug gently and tie a square knot around it.
- Add one thin card to each pocket and test the book before adding more.
Make It Yours
Use alternating plain and printed papers. A small label on each pocket can turn the book into a collection of places, people, or lovely ordinary days.
A Little Worktable Help
The pocket fold adds layers near the bottom of the spine. Pierce carefully rather than forcing the needle through unpunched paper. Keep heavy embellishments away from this thicker area.
Before You Call It Finished
Check all six pockets with a card. If a pocket feels narrow, use a smaller insert instead of pulling at the glued seam.
Your First Little Story
Choose six small things worth keeping. Give each a pocket and write why it mattered on the page above.
Project images are illustrative concepts. Use the construction diagrams and written steps as your making guide.
Back to the Library