The Library · At the worktable
Little Tags, Lovely Days
Make a single-ring tag journal
Featuring Crowned in Color
You don't always need a large page to keep a good memory. Sometimes a few words on a tag are just enough. This little journal can grow slowly, one day and one paper treasure at a time.
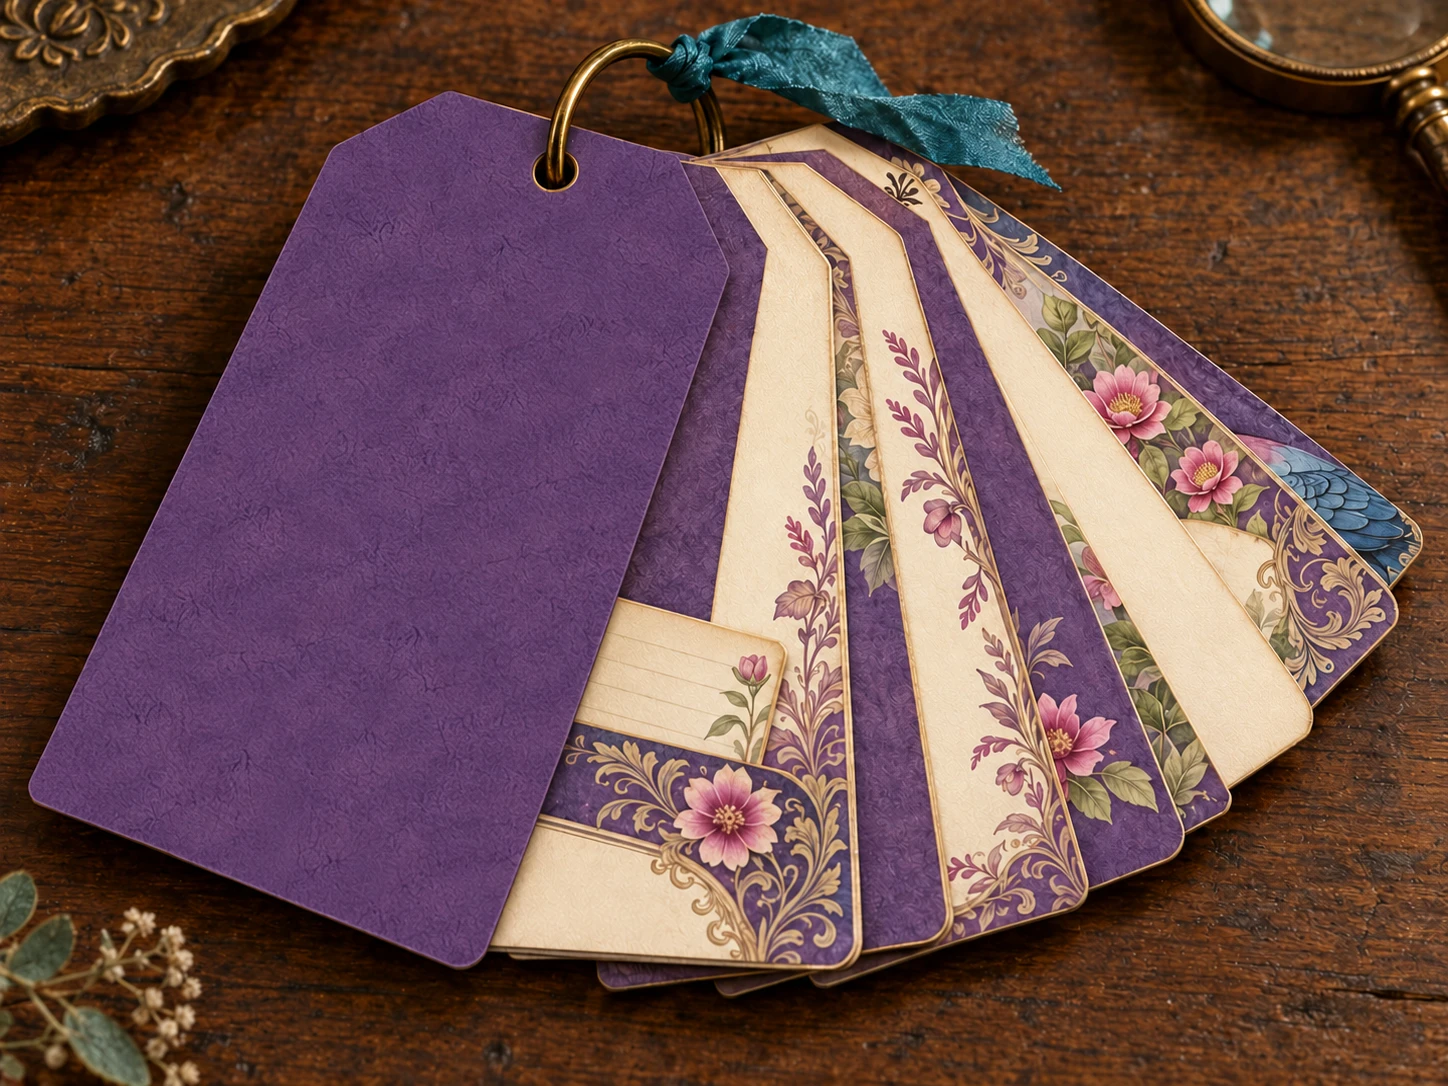
Finished size: 3 wide × 6 tall, plus the ring.
Inside: eight tag leaves between two covers.
Allow: about 45 minutes.
Gather and Cut
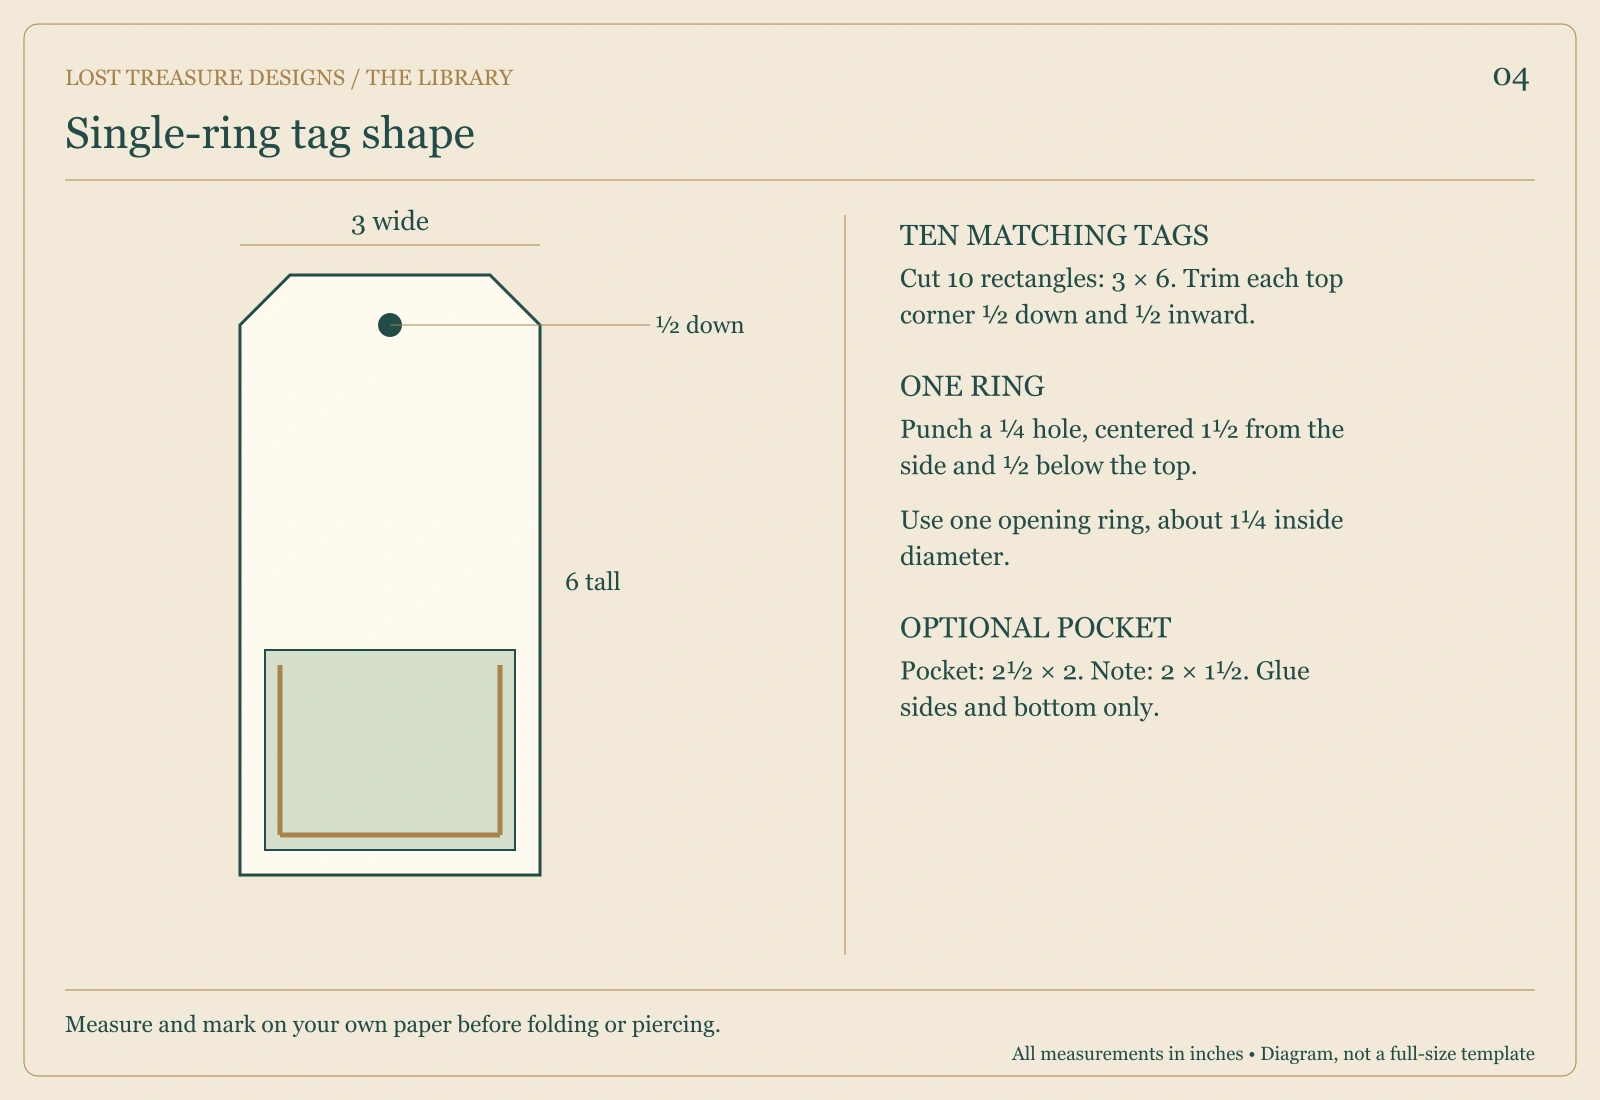
- Ten cardstock rectangles, each 3 × 6: eight pages and two covers.
- One opening binder ring, approximately 1¼ inches inside diameter.
- A ¼-inch hole punch, ruler, pencil, scissors, and optional hole reinforcements.
- Optional decorative panels, each 2¾ × 5¼.
Let's Make It
- Take one rectangle as your template. At each top corner, mark ½ inch down the side and ½ inch inward along the top. Connect the marks and trim off the two small triangles.
- Use that tag to trace the same shoulders on the other nine pieces. Trim them to match.
- On the template, mark a hole centered across the width: 1½ inches from either side and ½ inch below the top edge.
- Punch the template, then use it to mark the hole on every other tag. Punch a few pieces at a time only if your punch can handle them without shifting.
- Decorate the covers and pages, leaving the area around the hole clear. Add reinforcements to both sides of any thin page.
- Place the tags in order. Open the ring, thread it through all ten holes, and snap it shut.
- Fan the tags around the ring and turn them back one by one. Add only as much ribbon as still allows the pages to move freely.
Make It Yours
A 2½ wide × 2-inch rectangle makes a sweet little pocket. Glue it along the sides and bottom near the foot of a tag, then tuck in a 2 × 1½-inch note. Add one or two pockets first and check the stack before making more.
A Little Worktable Help
The ring measurement is a starting point, not a promise of unlimited space. If the tags bunch or won't turn, remove bulky layers or choose a larger ring. Keep metal charms on the outside so they don't dent the pages.
Before You Call It Finished
Check every hole for tears. Make sure the ring closes fully and that each tag can rotate without catching its neighbor.
Your First Little Story
Use one tag for each of seven days. Write down one lovely thing from each day, however small.
Project images are illustrative concepts. Use the construction diagrams and written steps as your making guide.
Back to the Library