The Library · At the worktable
Room for Another Chapter
Make a three-signature exposed-spine journal
Featuring Crowned in Color
By now we've made books that fold, books that open like gates, and books with pockets waiting on every turn. This final journal gives you three little groups of pages inside one cover. Each group can hold a different part of your story.
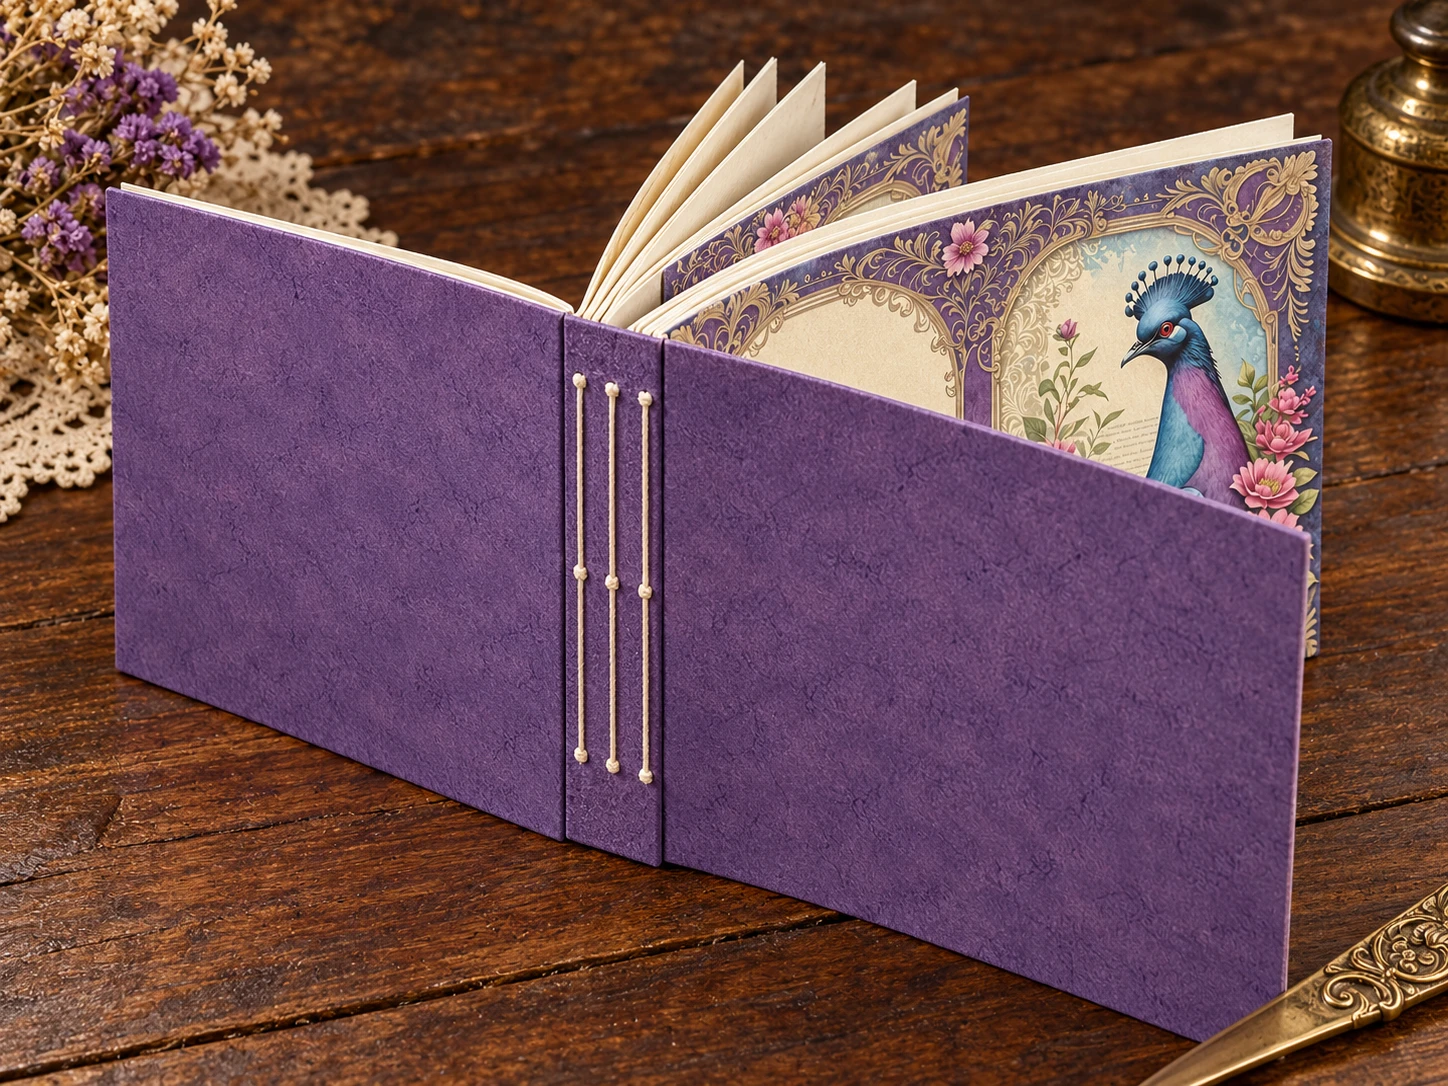
Finished size: 5½ wide × 8½ tall, with a ¾-inch spine.
Inside: three signatures of three folded sheets each, making 36 pages.
Allow: about 90 minutes.
Gather and Cut
- One sturdy cardstock cover, 11¾ wide × 8½ tall.
- Nine writing-paper sheets, each 11 × 8½.
- Three lengths of binding thread, each about 30 inches.
- Needle, awl, ruler, scoring tool, pencil, clips, and cardboard support.
The cover needs paper at least 11¾ inches wide. A 12 × 12-inch sheet can be trimmed to fit.
Let's Make It
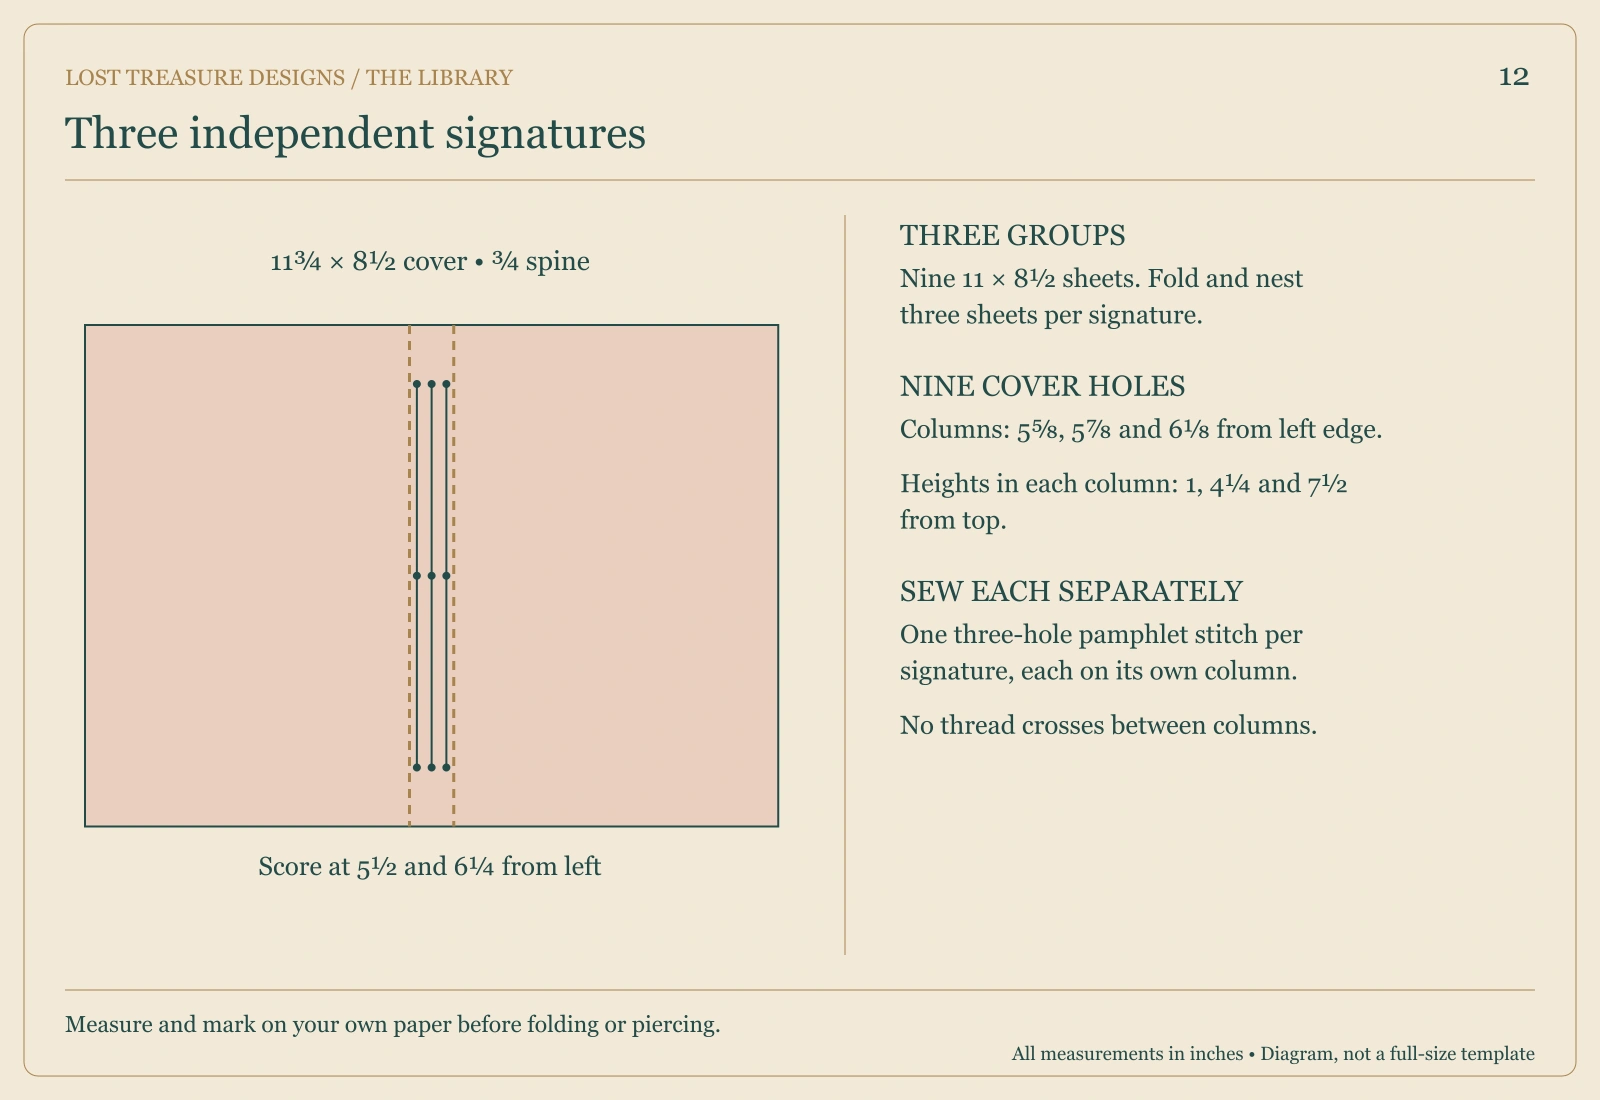
- Place the cover landscape. Score vertically at 5½ inches and 6¼ inches from the left. The space between these folds is the ¾-inch spine.
- Fold each writing sheet in half to make a 5½ × 8½ leaf. Nest three folded sheets together to make one signature. Repeat twice more.
- On the inside cover spine, mark three vertical sewing lines. Measured from the cover's left edge, they are at 5⅝ inches, 5⅞ inches, and 6⅛ inches. Each line binds one signature.
- Along each sewing line, mark holes 1 inch, 4¼ inches, and 7½ inches from the top. Pierce these nine cover holes.
- Make a guide for the signatures with holes at the same three heights. Pierce each signature through its center fold.
- Position the first signature against the left sewing line. Align its holes and hold it in place with clips.
- Sew from inside the signature out through its middle hole and the matching cover hole. Leave a 4-inch tail inside.
- From outside the cover, return through the top hole on that same sewing line and into the signature. Travel down inside the fold and sew out through the bottom hole and cover.
- Return through the middle cover hole and signature hole. Keep the two ends on opposite sides of the long interior stitch. Tie a square knot around that stitch.
- Repeat with fresh thread for the second signature on the middle line and the third on the right line. Keep every signature on its own column of holes.
- Fold the covers around the finished stack. Gently open each group of pages to settle the book.
Make It Yours
Give the three signatures different purposes: things you've noticed, things you've made, and things you want to remember. Add a few thin pockets, then check the closed book before filling them.
A Little Worktable Help
This binding has three independent lines of exposed stitching, not a chain stitch between signatures. Don't pull the threads across to neighboring columns. The ¾-inch spine leaves some room for paper layers, but it isn't meant for thick bundles of keepsakes.
Before You Call It Finished
Open to the middle of each signature. Every knot should catch its long stitch, each group should remain secure, and the cover should close without straining at the holes.
Your First Little Story
Begin with a note to the person who will someday open this book—even if that person is simply you, a year from now.
You don't have to fill it today. A new chapter can begin with one page.
Project images are illustrative concepts. Use the construction diagrams and written steps as your making guide.
Back to the Library