The Library · At the worktable
Small Enough to Keep Close
Make a matchbook memory journal
Featuring A Grateful Heart
A matchbook journal is a tiny folded cover with a handful of pages held at the foot. Open the flap, lift a leaf, and there is room for a small thought. Make one for your bag, one for a gift, and perhaps one simply because the paper is lovely.
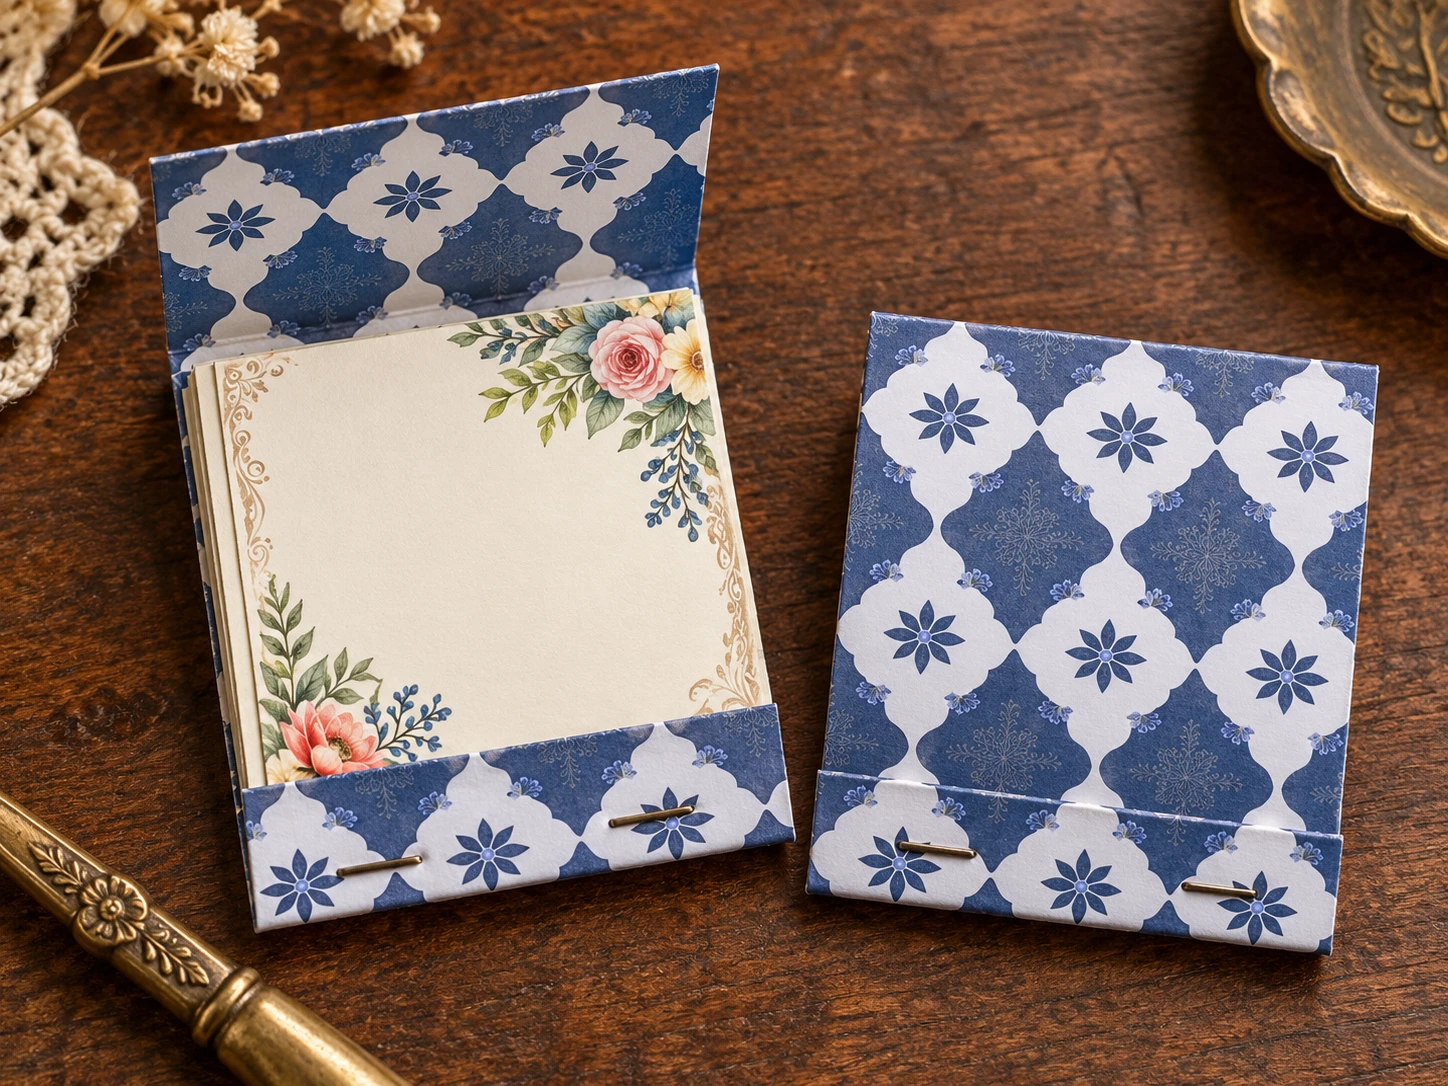
Finished closed size: 3 wide × 3¾ tall.
Inside: eight small leaves.
Allow: about 30–45 minutes.
Gather and Cut
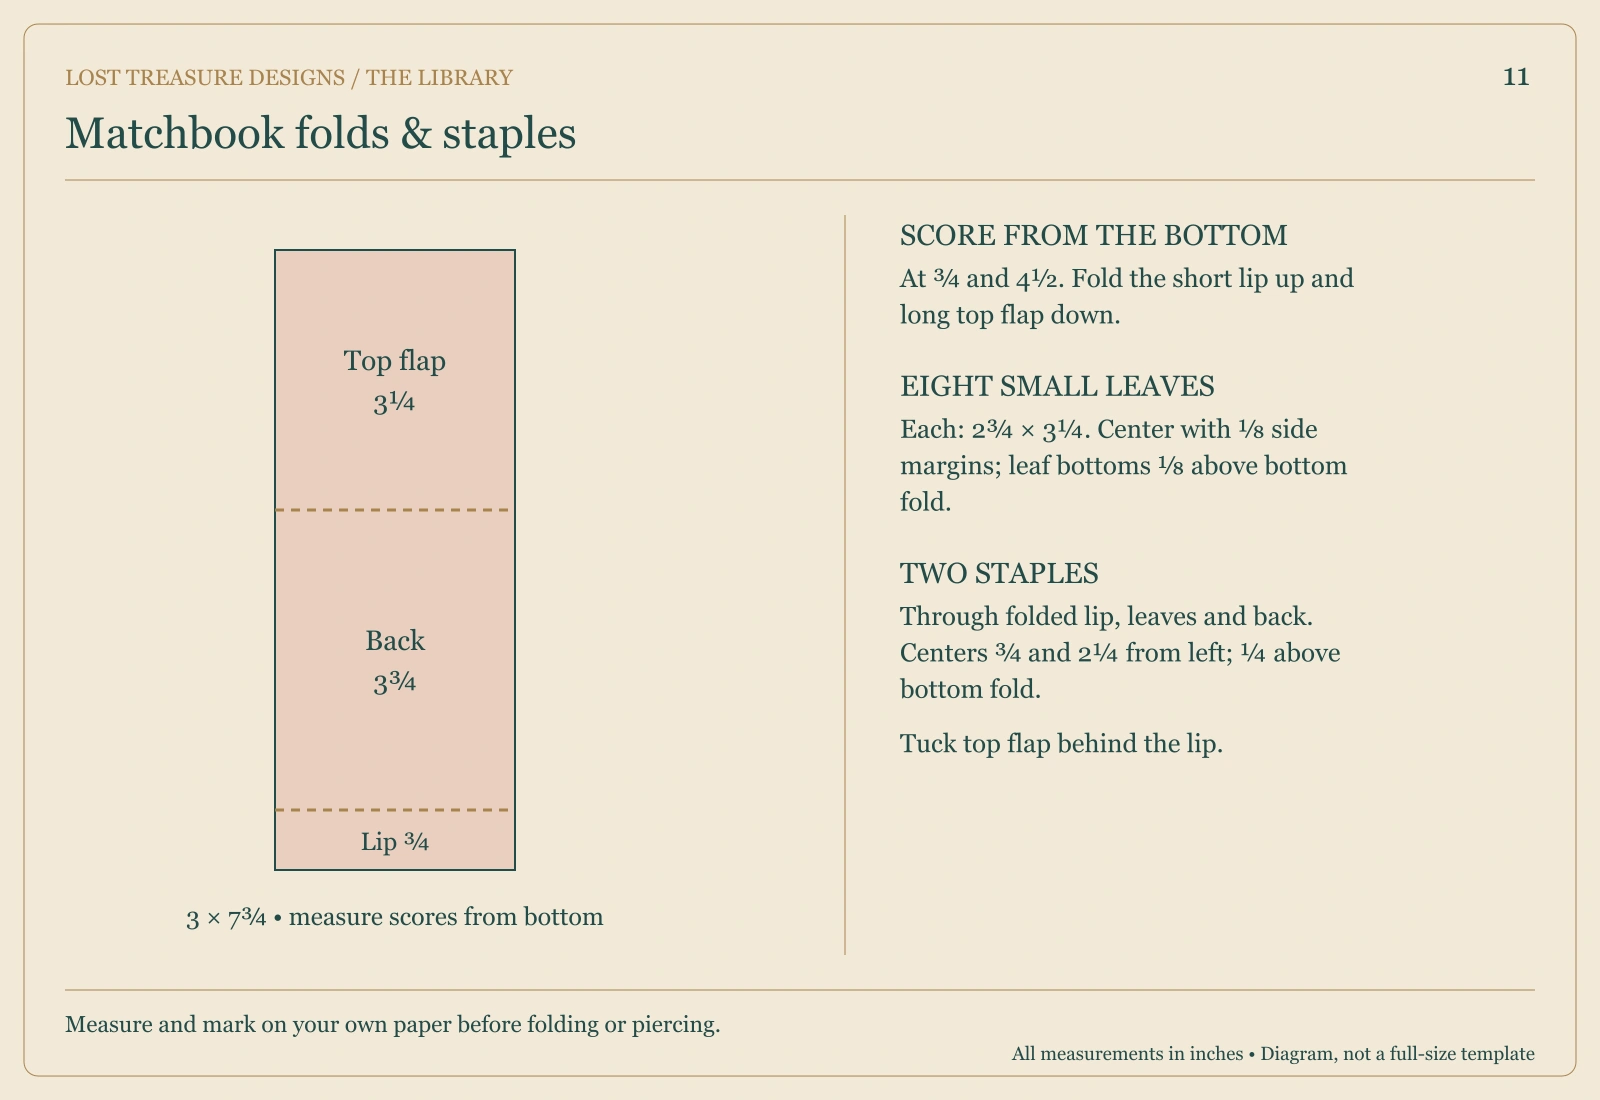
- One cardstock strip, 3 wide × 7¾ long.
- Eight lightweight paper leaves, each 2¾ wide × 3¼ tall.
- A standard stapler, ruler, scoring tool, and optional decorative paper.
Let's Make It
- Place the cover strip vertically. Measure from its bottom short edge and score across the width at ¾ inch and 4½ inches.
- Fold the bottom ¾-inch flap inward. This will be the retaining lip. Fold the upper 3¼-inch flap down over the central 3¾-inch back panel.
- The top flap ends ½ inch above the book's bottom fold, overlapping the retaining lip by ¼ inch. Its lower end will tuck behind that lip. Open both flaps again.
- Place the paper stack on the inside central back panel. Center it side to side, leaving ⅛ inch on each side.
- Position the bottom of the leaves ⅛ inch above the bottom fold. Their tops should sit ⅜ inch below the upper fold.
- Fold the retaining lip upward over the lower part of the paper stack. Clip everything steady.
- Staple twice through the lip, the pages, and the back cover. Put the staple centers about ¾ inch and 2¼ inches from the left edge, on a line ¼ inch above the bottom fold. The staple crowns should face the lip; the closed legs will be on the outside back.
- Check that both staples are properly closed. Cover their legs on the back with a small strip of paper or bookbinding tape if desired.
- Fold the top flap down and tuck its edge behind the retaining lip, above the staples.
Make It Yours
Use the fronts of the leaves for tiny notes and the reverse for the date or a little drawing. Keep decorations flat so the cover can tuck into its lip.
A Little Worktable Help
These pages are secured at the bottom and lift from the top. This is not a tear-off pad unless you choose to tear out a leaf. Leave the lower ¾ inch of each page clear for the binding and turning area.
Before You Call It Finished
Lift each leaf, then close and tuck the flap. If it catches the staples, check that they sit low enough and that bulky paper layers aren't filling the lip.
Your First Little Story
Give each leaf one sentence beginning, “Today I want to remember…”
Project images are illustrative concepts. Use the construction diagrams and written steps as your making guide.
Back to the Library