The Library · At the worktable
Somewhere to Tuck a Secret
Make an envelope pocket journal
Featuring Book Nook
Some memories need a page. Others need a little place to hide. This journal is made from envelopes, so every leaf becomes a pocket for letters, photographs, and notes you might not want to leave in plain sight.
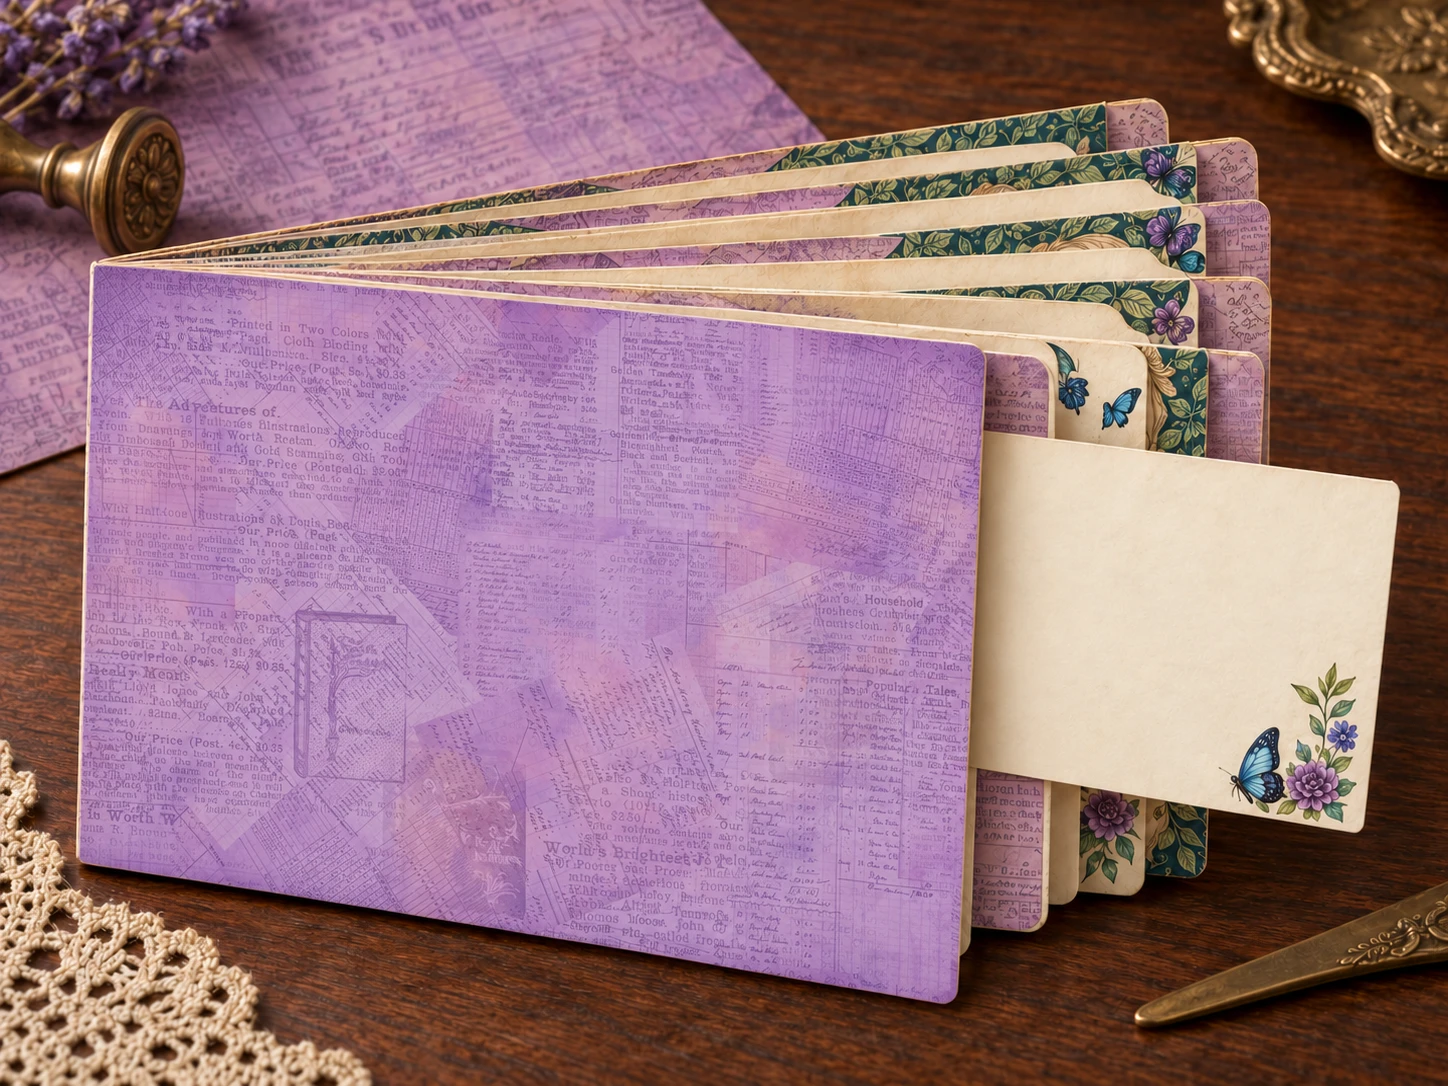
Finished cover size: 6 wide × 4⅝ tall.
Inside: six envelope pockets.
Allow: about 60–90 minutes, plus drying.
Gather and Cut
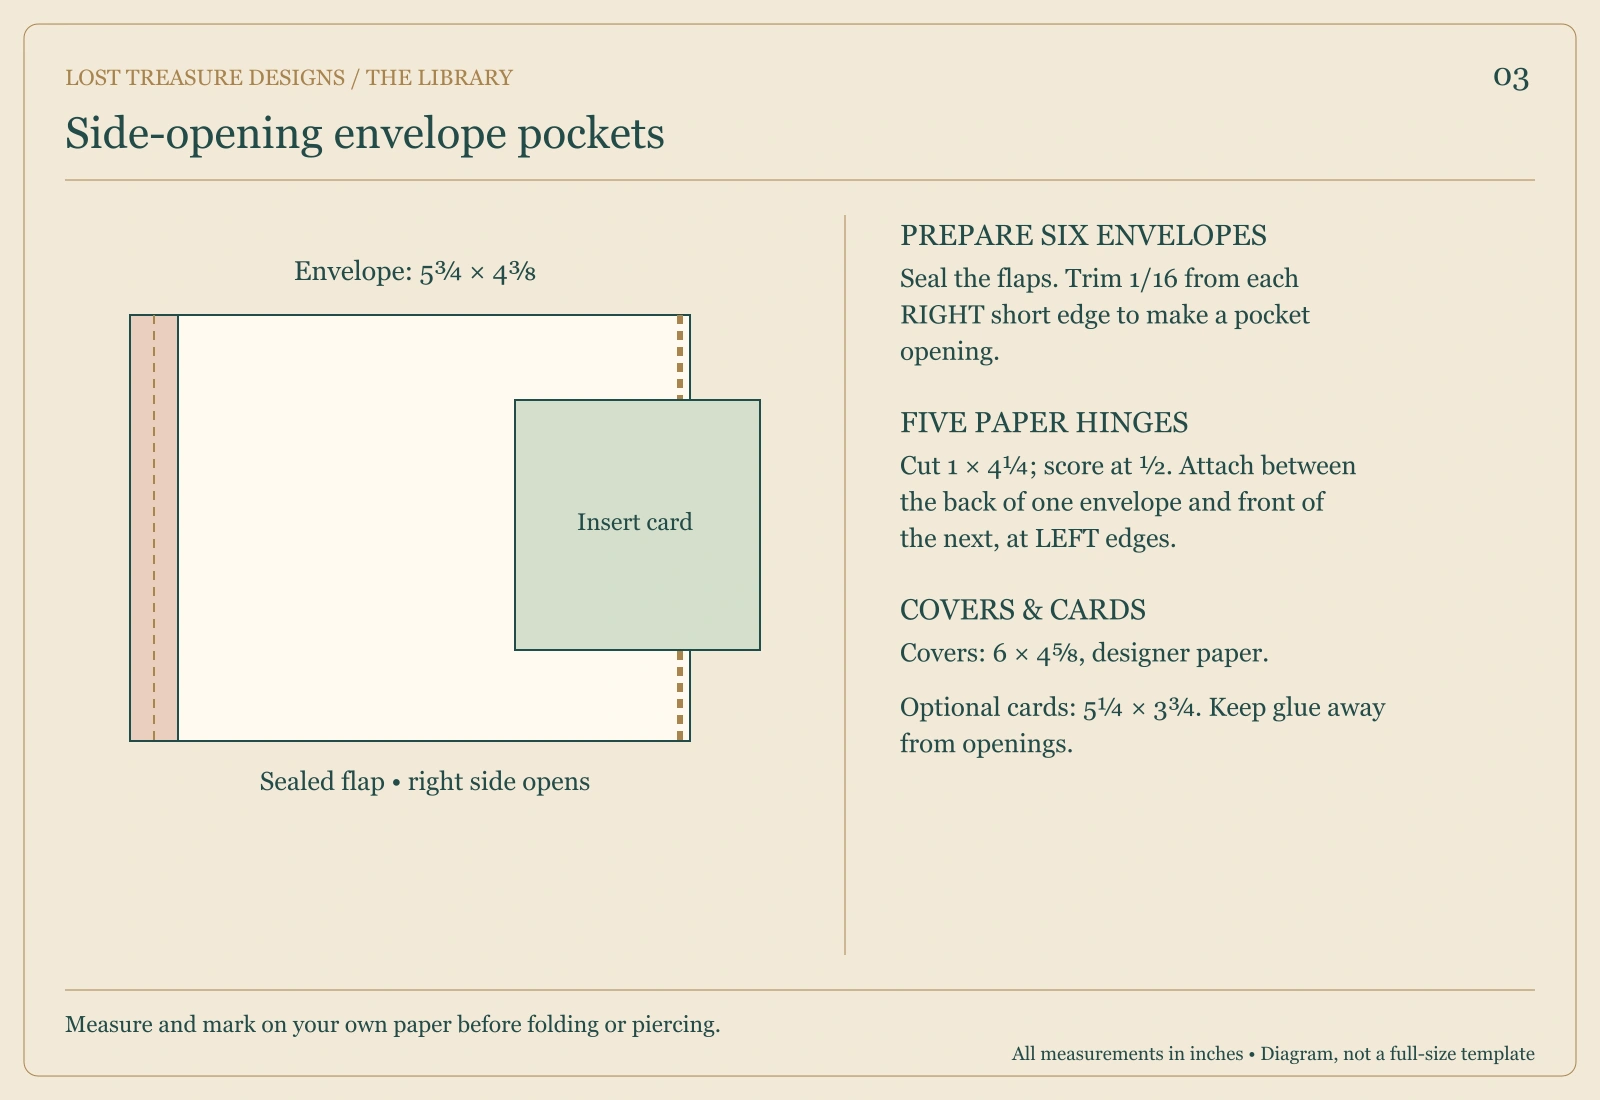
- Six A2 envelopes measuring 5¾ wide × 4⅜ tall when closed.
- Five paper hinges, each 1 inch wide × 4¼ tall.
- Two cardstock covers, each 6 × 4⅝.
- Glue, ruler, scoring tool, and a paper trimmer.
- Six optional writing cards, each 5¼ × 3¾.
Check your actual envelopes before beginning. This tutorial uses the measurements above, not every envelope sold under a similar name.
Let's Make It
- Seal all six envelope flaps. Let them dry.
- Lay each envelope landscape and trim a narrow 1⁄16-inch strip from its right short edge. This opens a side-loading pocket. Leave the left edge closed for binding.
- Score each hinge down its length at ½ inch. Fold it like a little book.
- Lay envelope one face up with its opening at the right. Turn it over. Glue one half of a hinge onto the back along its left binding edge, centering the hinge vertically. Its fold should meet the envelope's left edge.
- Place envelope two face up beside it. Glue the free half of the hinge onto the front of envelope two along its left binding edge. Keep the pocket openings at the right and the top edges aligned.
- Fold envelope two behind envelope one. The hinge should close between them, with the folded spine at the left.
- Repeat: attach the next hinge to the back of envelope two and the front of envelope three. Continue until all six envelopes form a turning stack.
- Center the front face of envelope one on the inside of the front cover and glue it down. Center the back face of envelope six on the back cover and glue it down. Leave their right-side openings unobstructed.
- Dry under a light weight, then insert the writing cards.
Make It Yours
Number the pockets, give them little titles, or add a label for each person whose letters you want to keep. Use thin decorations so the envelope leaves can turn.
A Little Worktable Help
Before gluing all five hinges, make the first connection and turn the pages. If the hinge resists, check that its fold sits at the envelope edges rather than farther inward. Keep glue away from the pocket mouths.
Before You Call It Finished
Slide a card into every envelope and turn all six leaves. This is a lightly filled journal; overstuffing makes the simple hinges strain.
Your First Little Story
Write someone a letter you may never send. Give it a pocket of its own.
Project images are illustrative concepts. Use the construction diagrams and written steps as your making guide.
Back to the Library